This feature is active if virtual hosting has been configured for the domain. It creates and provides password-protected access to the directories where the secure documents reside in the virtual domain. It is possible to create directories under either the standard virtual host accessible via http protocol, or if applicable for the given domain, under the SSL virtual host accessible via https protocol.
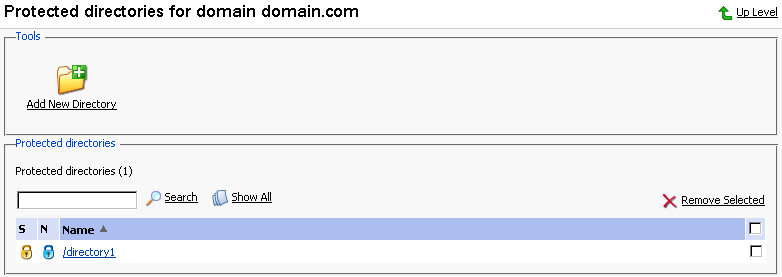
To access the protected directories management functions, use the  Directories icon on the Domain Administration page. The page will open listing all protected directories of this domain:

Each directory name is accompanied by icons, identifying which virtual host type (SSL or non-SSL) the directory resides within:  depicts non-SSL;
  depicts SSL.
NOTE
We strongly recommend that you create and change the protected directories through Plesk and not within the FTP program. Plesk may not recognize manual changes.
Follow these steps to create secure directories for the domain:
Click
 Add New Directory. This takes you to the Protected Directory Creation page:
Enter the name of the protected directory you wish to create in the Directory name field.
For Directory Location you can choose a non-SSL, SSL secure directory, or both. Use the appropriate checkboxes to select.
Click in the Header Text input box, and enter the header for this directory. When a user tries to access the protected directory, the text in this box displays as the realm they are entering.
Click OK to complete creation. You will be taken to the list of protected directory users:

To add a new user, click the
 Add New User icon. You are taken to the new directory user creation page:
Specify the user name, password and confirm password.
Click OK to submit. You will return to the Protected Directory Management page. The new user record will appear in the list of users.
To remove existing directory users select the users that you wish to remove using the corresponding checkboxes and click Remove Selected. You will be asked for confirmation prior to deletion of the directory users.
To access a directory user record in order to edit the user password, click on the user name in the list.
Once you have completed everything within your new protected directory, click OK to submit all changes to the system and to return to the Protected Directory page.
NOTE
An SSL protected directory can be created even if SSL support has been disabled for the domain, however this protected directory will be inaccessible until you enable the SSL support.
Follow these steps to edit protected directory properties:
On the Protected directories page, click on a title of the directory that you wish to edit. You will be taken to the Protected Directory Management page.
Edit the directory properties by following the same steps outlined above, in the Creating a protected directory section.
Click OK to submit all changes to the system and to return to the Protected Directories page.
To remove one or more directories, follow these steps:
Select the checkboxes in the list of protected directories.
Click Remove Selected. The Protected Directory Removal page appears.
Confirm removal, and click OK.
NOTE
Removing a protected directory in Plesk does not delete the directory off the server, it simply removes the protection. Meaning that the directory and its contents will now be reachable via the Internet without the need for login and password.