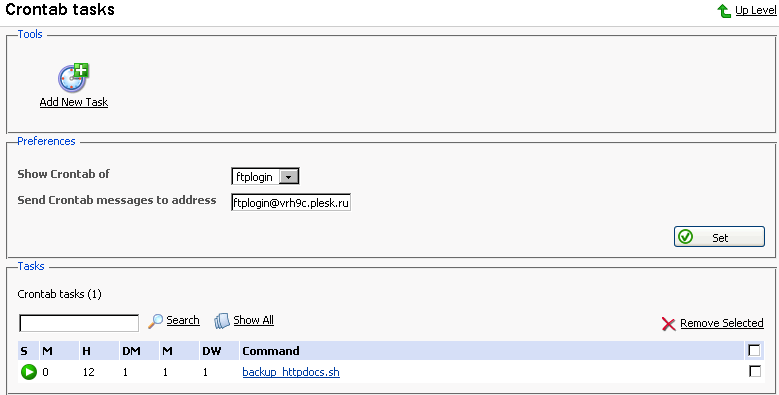
To access the crontab management functions, click the  Crontab Manager icon on the Domain administration page. The Crontab management page will open:

On this page, you can view scheduled tasks of various system users, set the e-mail address for the crontab messages to be sent, schedule new tasks and remove them.
The Show Crontab of: drop-down box indicates the system user, whose scheduled tasks are currently displayed. It also allows to select another system user to view and/or manage scheduled tasks that belong to that user.
Each line in the Crontab task list represents a single task. The Status (S) column shows whether the selected task is enabled or disabled (the disabled tasks are not executed). The Command column contains the command that is executed within the selected task and serves as a link to the page that allows editing the selected scheduled task properties.
The task list can be sorted by its parameters in ascending or descending order. To sort the task list, click on the name of the sorting parameter. An arrow will show the order of sorting. The sorting criteria are:
To add a new task to the list, follow these steps:
Click the
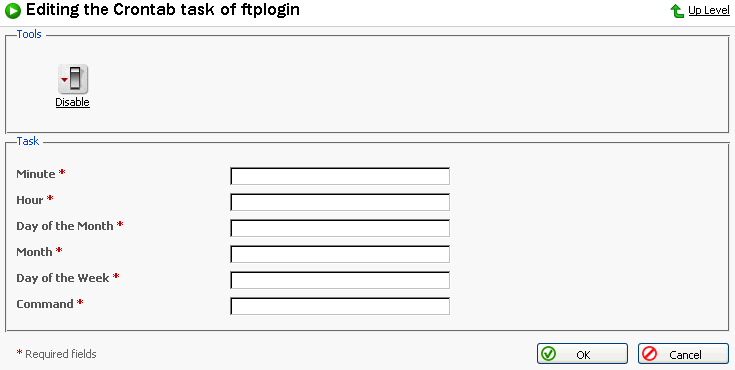
 Add New Task icon on the Crontab management page. You will be taken to the crontab record creation/editing page:
Choose the status of the scheduled task by clicking the
 Enable or
  Disable icon. The current status is displayed by the corresponding icon.
Specify the date and time for the task to be executed: Minute - enter the value from 0 to 59 or *, Hour - enter the value from 0 to 23 or *, Day of the Month - enter the value from 1 to 31 or *, Month - enter the value from 1 to 12 or *, Day of the Week - enter the value from 0 to 6 (0 is Sunday) or *.
Type in the command to be executed in the Command input field.
Click OK.
To delete one or several scheduled tasks from the list, select the corresponding checkboxes and click Remove Selected.
To enable crontab to send the messages to a specified e-mail address, enter the e-mail address into the Send crontab messages to address: text input field and click Set. All scheduled tasks from the displayed list that output some information will automatically have their output sent to the specified address. The "" entry in this field specifies that the sending crontab messages option is disabled.